What is backlight photography, and how do you use it?
Backlight photography gives photos and video a striking, artistic edge. Learn what it is, which settings you need, and tips for shooting backlit footage.

Backlight photography is dramatic, intense, artsy — it can flip a standard-looking frame into something magical. But it isn’t easy. Let’s cover the essentials today.
We’ll discuss:
- What is backlight photography?
- Why do filmmakers use backlight photography?
- What’s the difference between frontlit and backlit photography?
- Placing a backlight in the three-point lighting setup
- 9 tips and tricks for great backlit video
What is backlight photography?
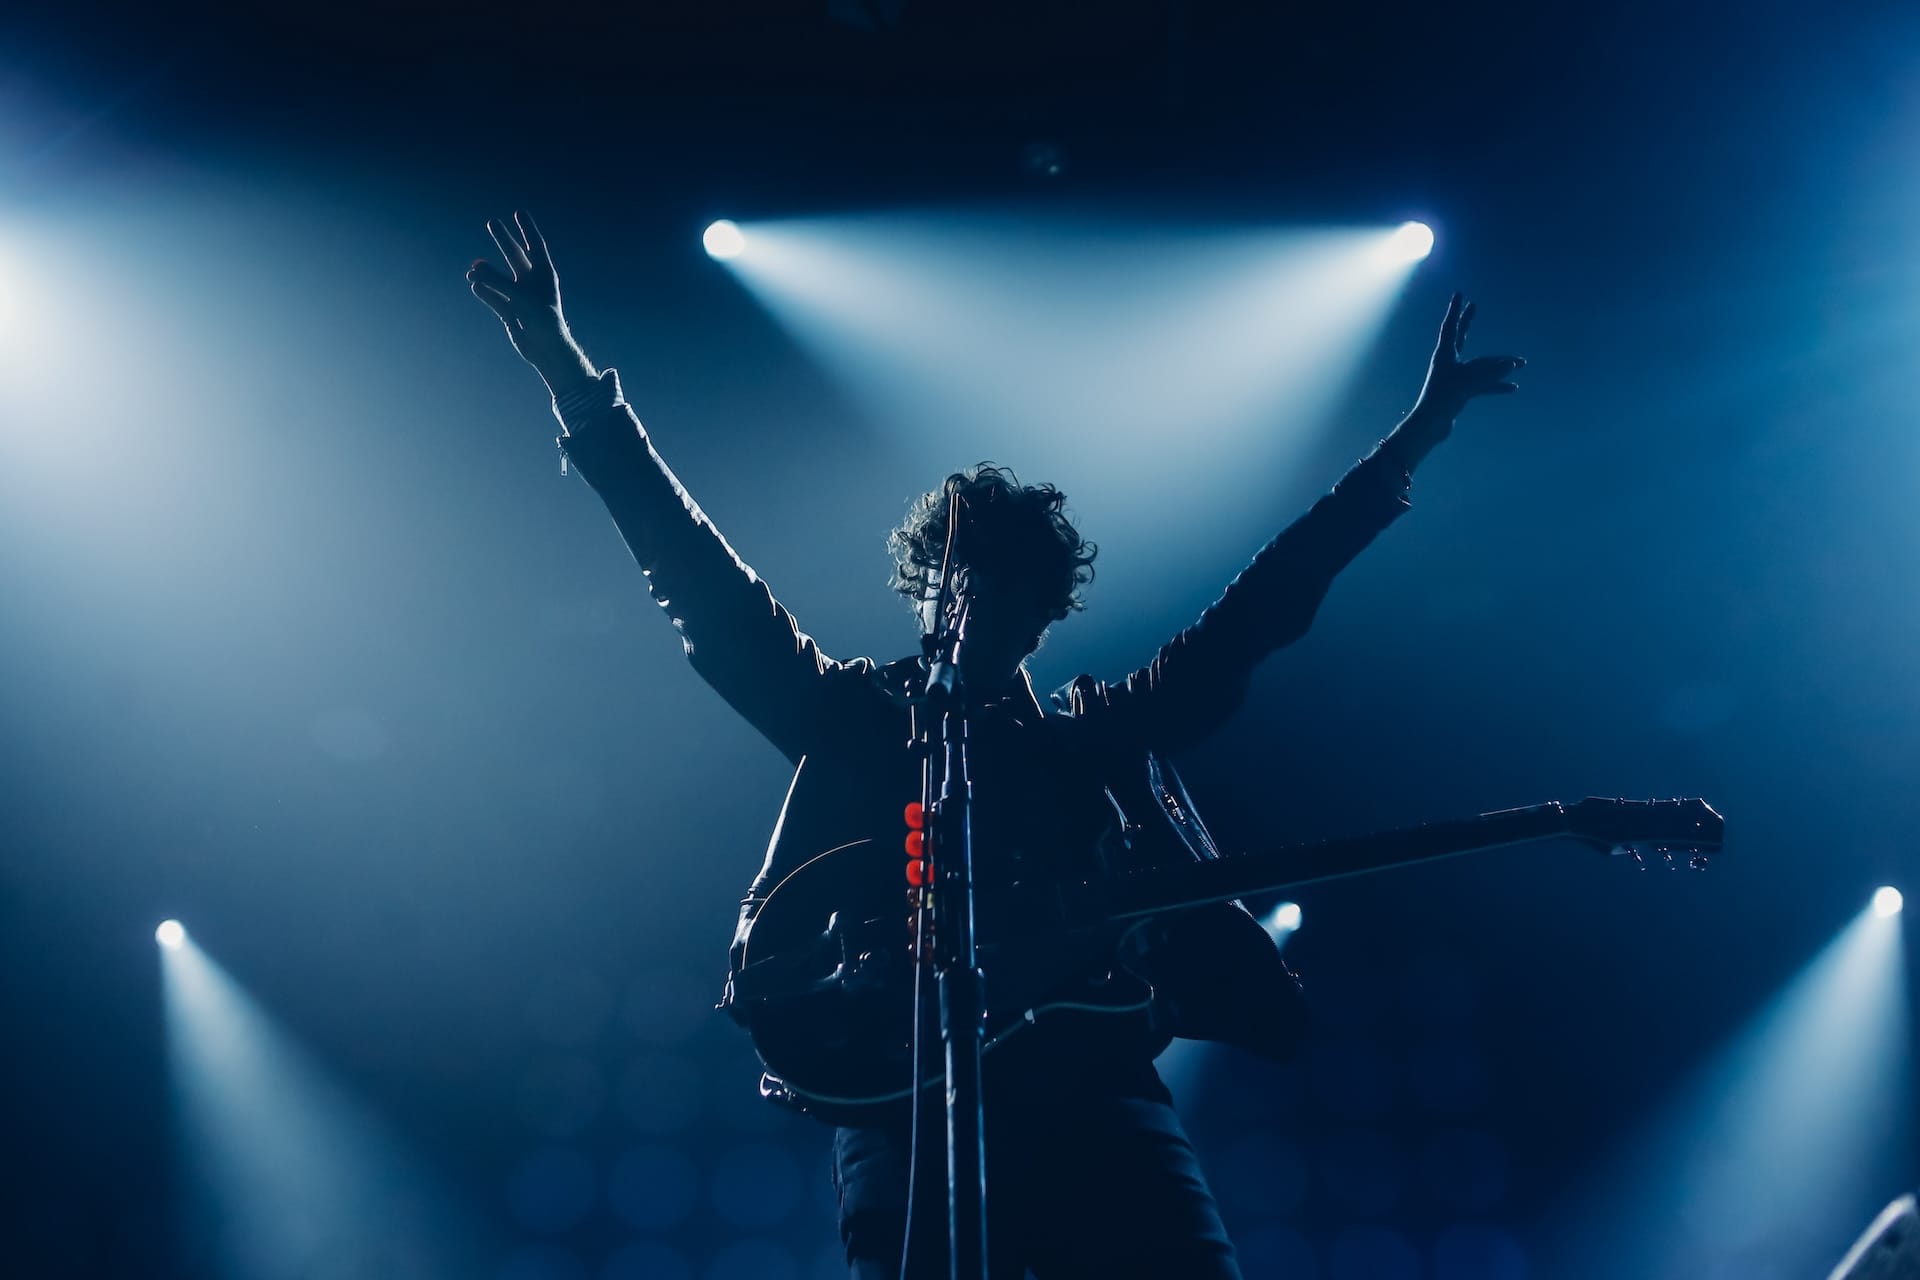
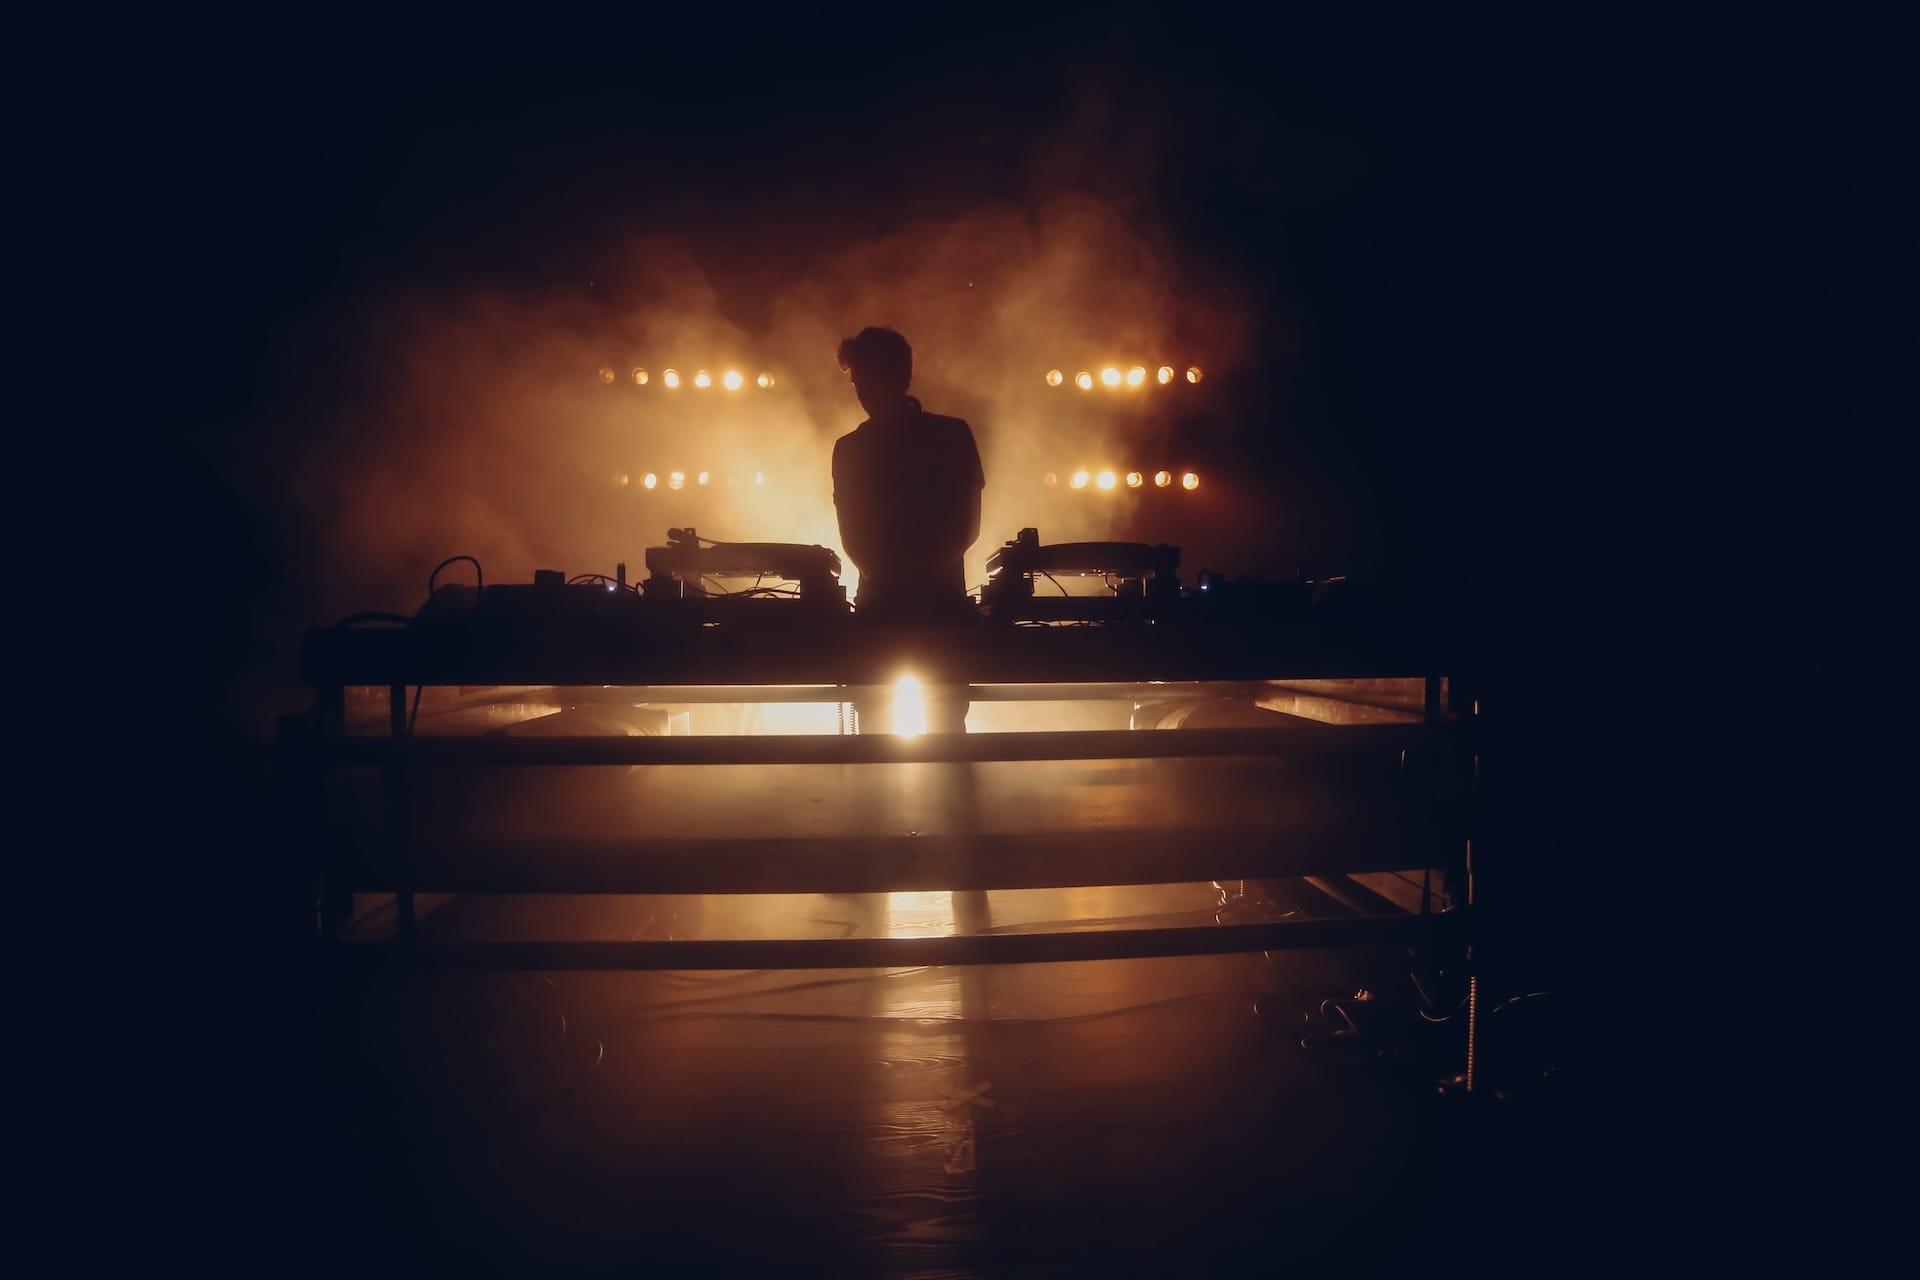
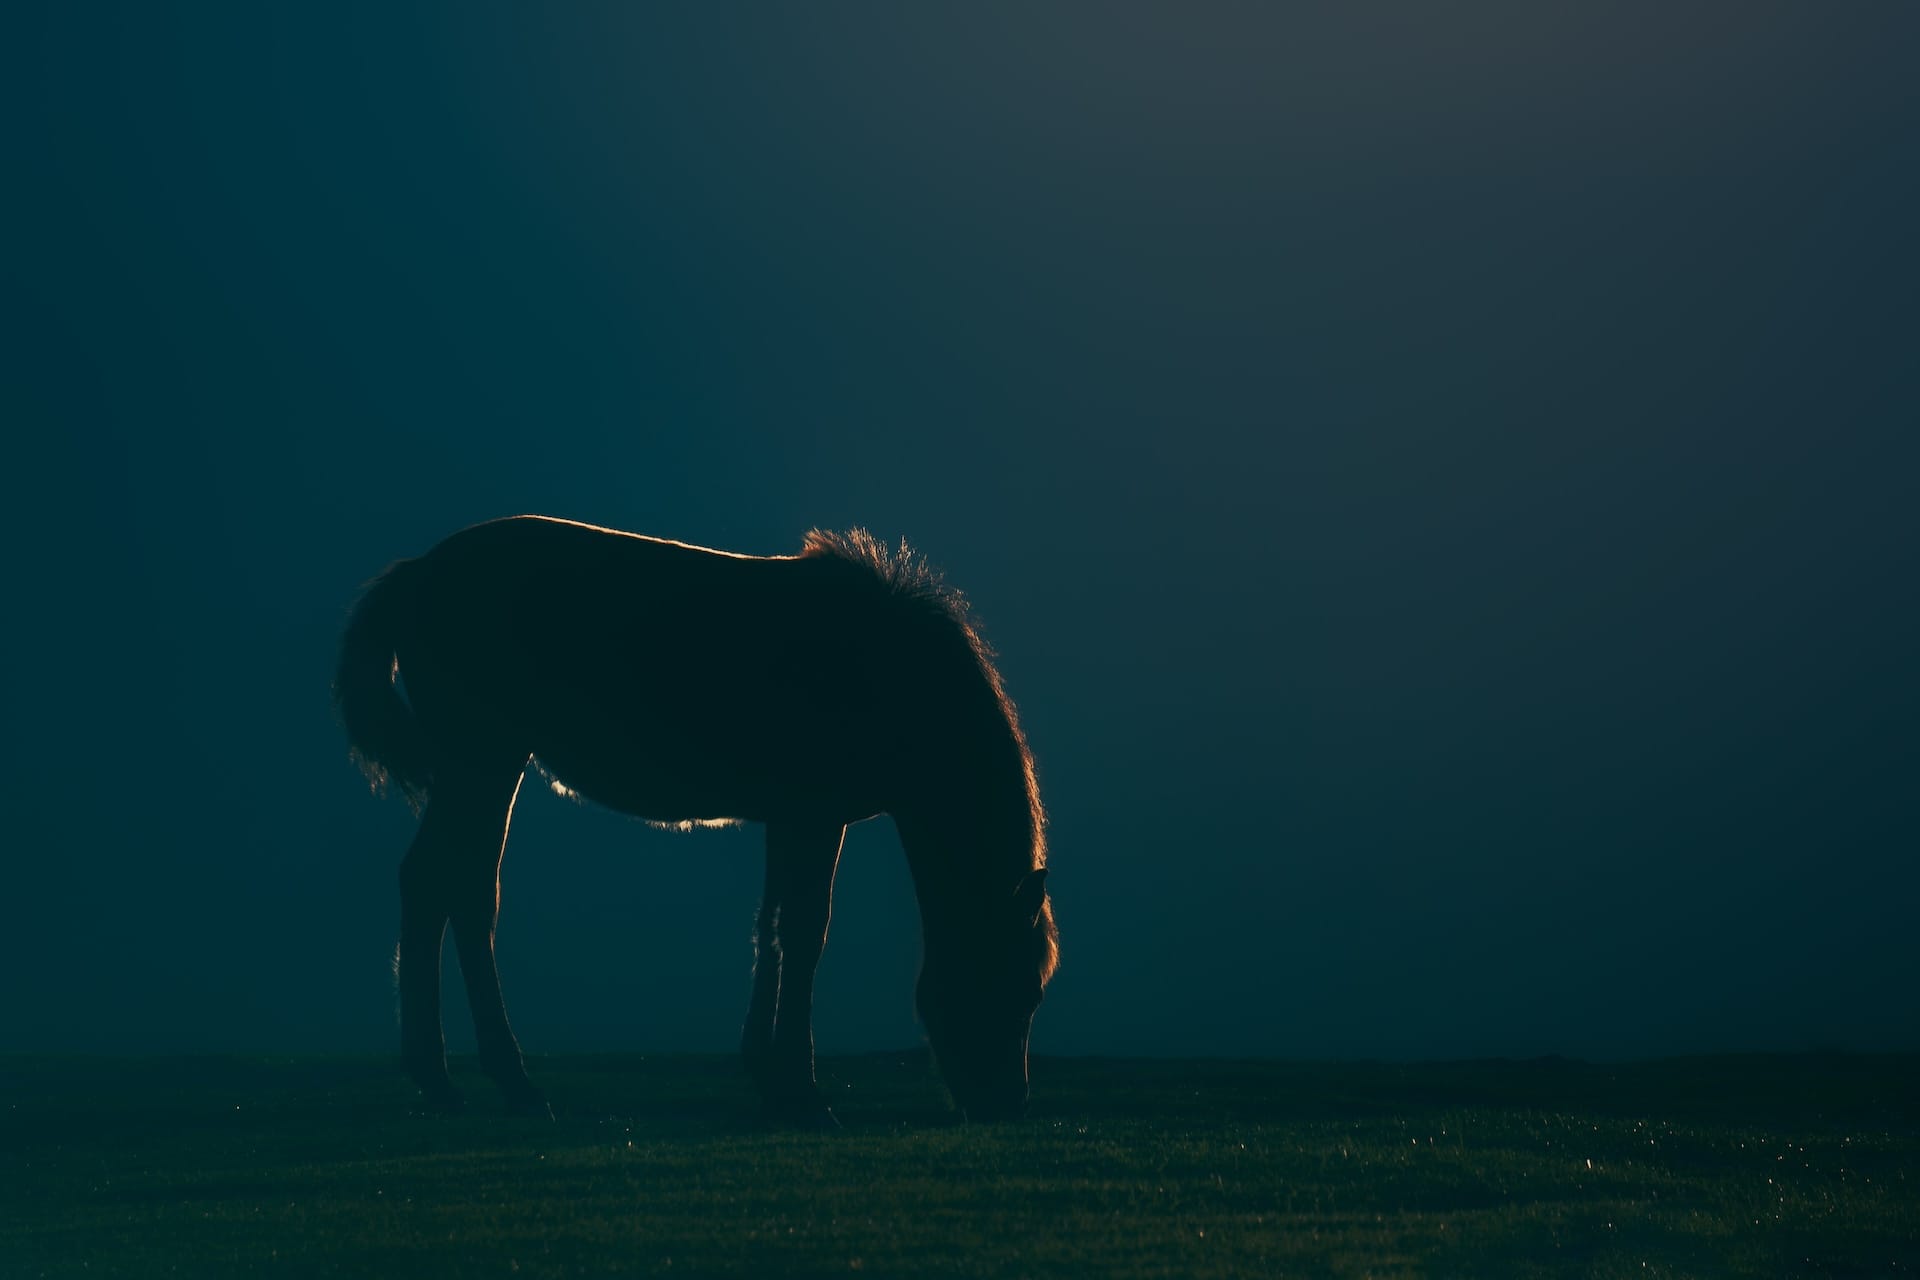
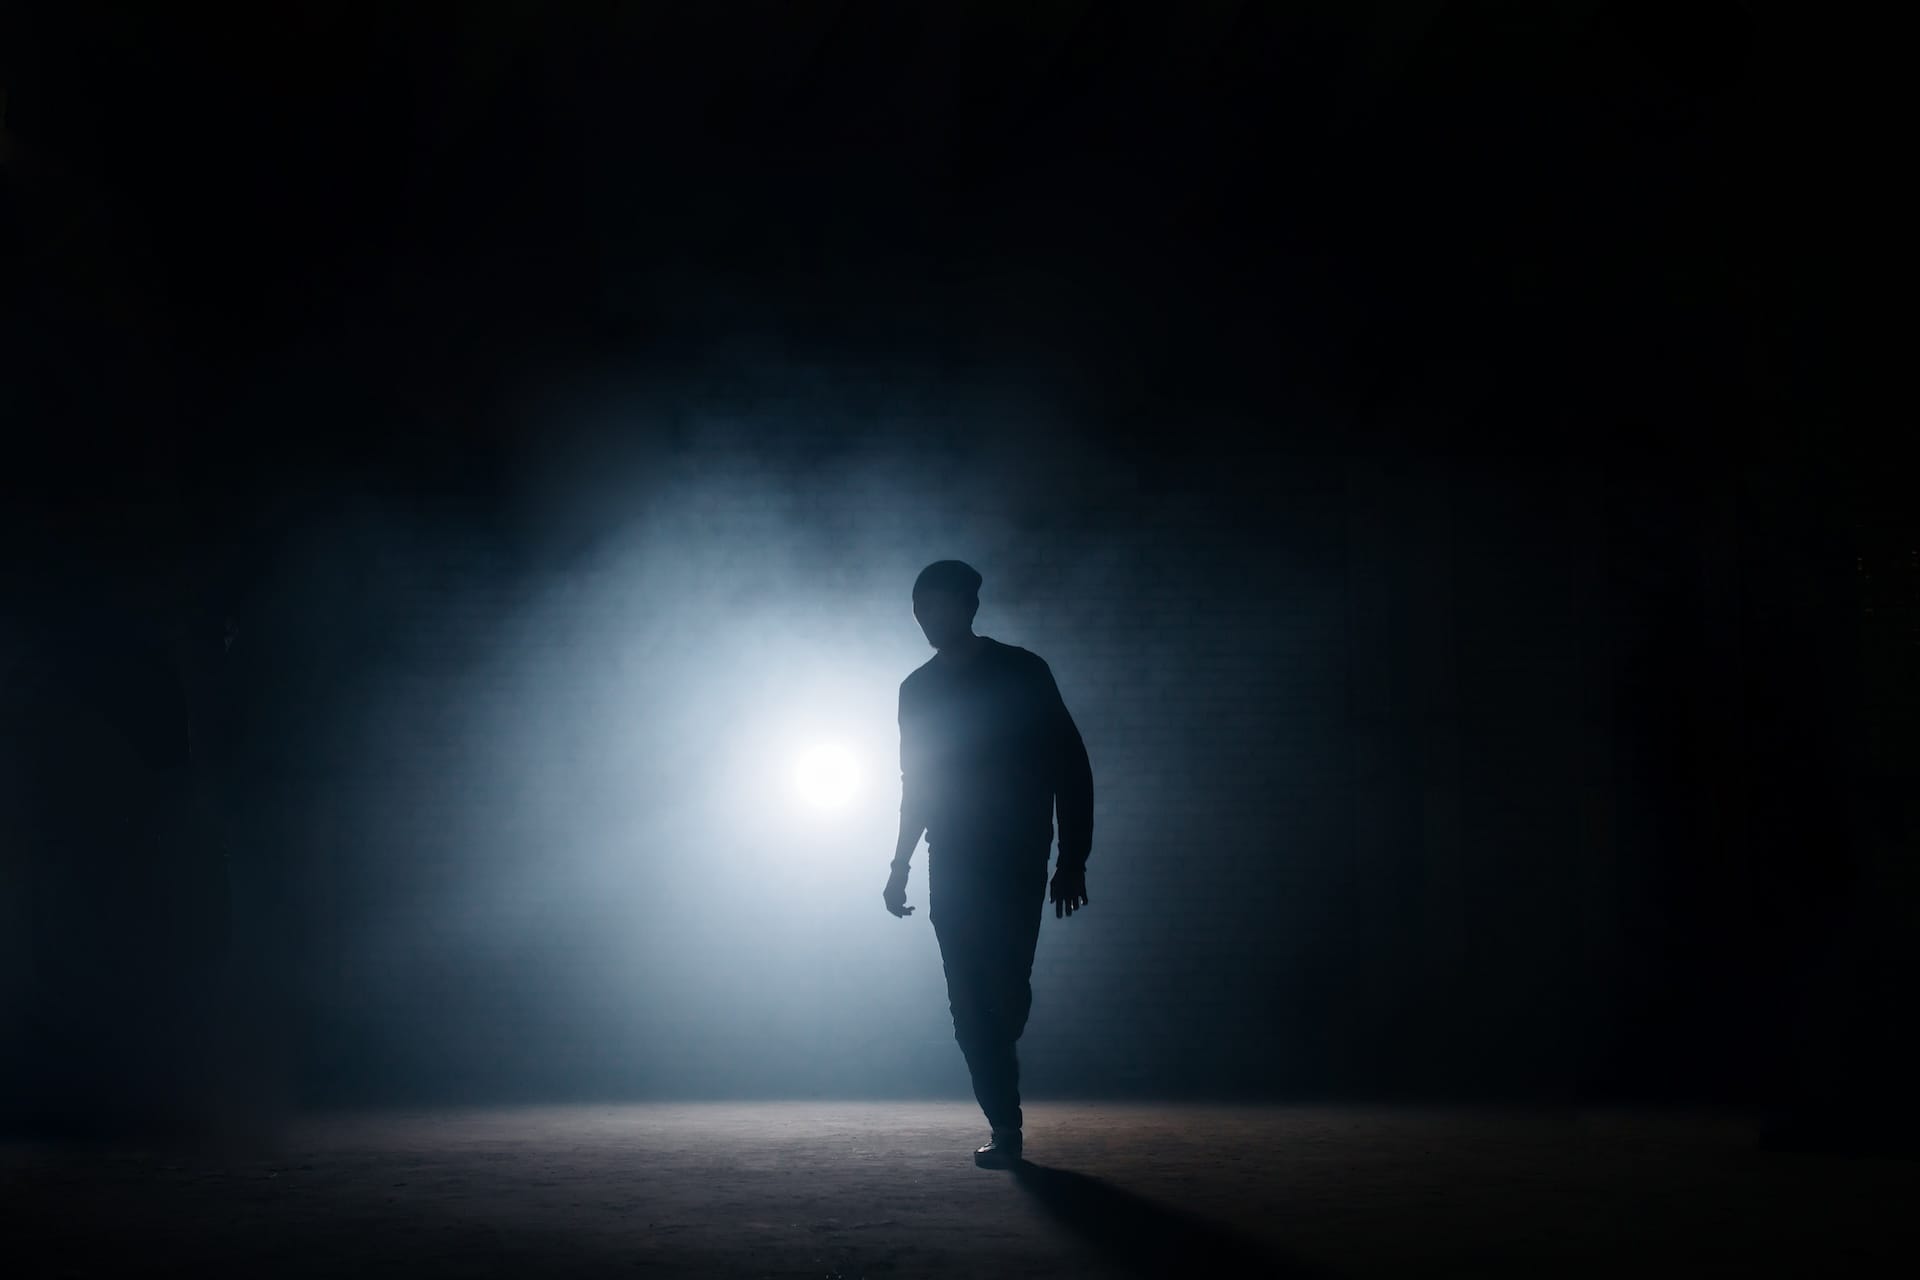
For all of the technical terms littered throughout filmmaking, backlight photography does what the name suggests: it positions a light source behind an actor or subject. This results in a classy, unmistakable rim of light around the subject. It can be as extreme as a silhouette, or mild as an outline, and is used everywhere from TV to theater, concerts to blockbusters.
The light is often positioned higher than the subject, providing depth and focusing on shapes. Backlight photography is a core part of the three-point lighting set-up — more on that shortly — and adds a dose of drama to your compositions and footage.

Why do filmmakers use backlight photography?
Backlit video and images are striking, right? It’s not a skill you can pick up from day one, nor is it appropriate for every single shot. But, if used tactfully, backlight photography can cast a frame in an entirely new, well, light. Let’s dig into some of the main uses below:
- To add depth: A backlight establishes depth between the subject and background. This depth clearly separates the subject from the background, drawing the viewer’s eye to the former.
- To create drama: The contrast between subject and background builds drama — it’s not something viewers expect to see in everyday life. A well-delivered backlit shot can inspire real, tangible emotion, driving home the vibe written in the script.
- To use natural light: Shooting outdoors may limit your lighting rig, depending on circumstance and budget. Using the sun as a backlight is a wallet-friendly way to cast a stand-out image.
- To define shapes: A well-angled backlight can emphasize a specific shape. If you’d like to bring attention to something like a character’s hat or their bag, you can do so with backlighting.
- To reduce flatness: Sometimes, your composition doesn’t quite work. The background may feel stale, or the colors don’t pop how you’d like. Backlight photography could be your savior — the stark, dramatic technique can turn a flat image into a much more interesting, well-realized frame.

What’s the difference between frontlit and backlit photography?
Frontlight photography is the opposite of backlight photography, illuminating from the front of the subject via key lighting. It’s common in daytime TV, online content, and ads, as it lends a more natural finish. The shots aren’t as dramatic as backlit content, but there’s a time and place for both.
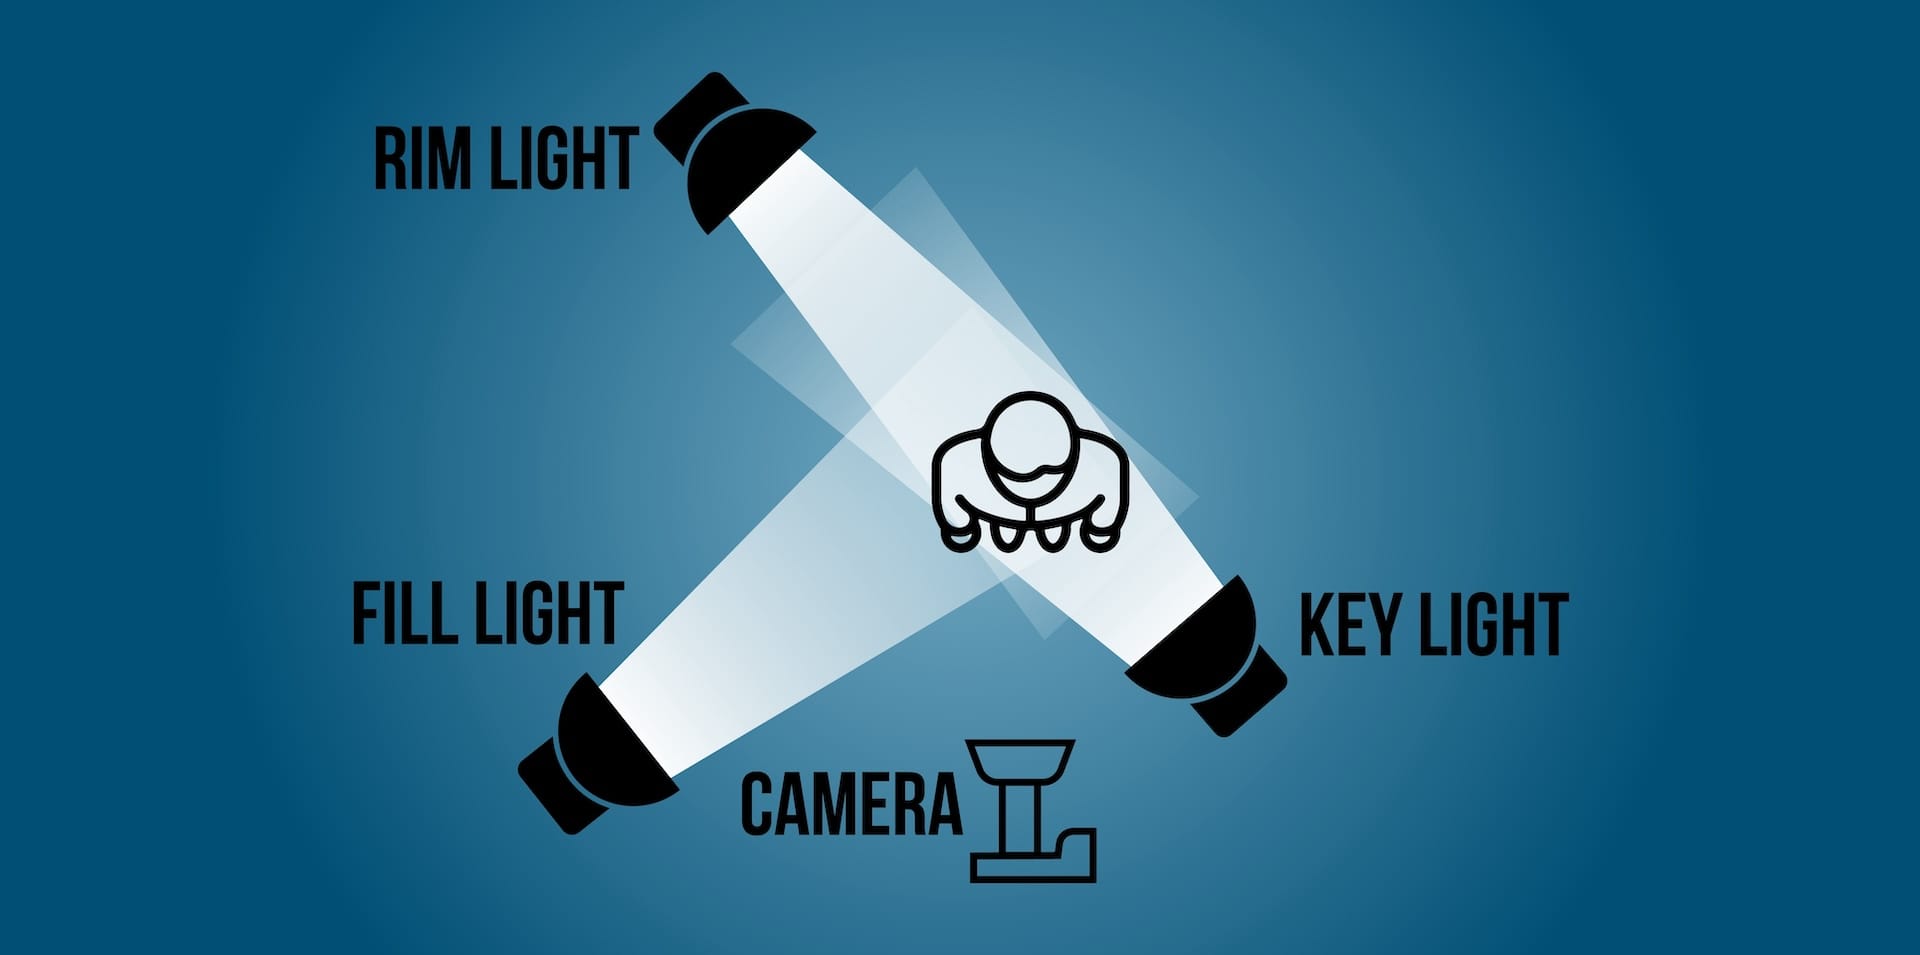
Placing a backlight in the three-point lighting setup
Backlight photography works as part of the three-point lighting setup, which is found in most professional productions. The three points refer to three primary light sources: key lighting, fill lighting, and backlighting.
The key lights illuminate the subject’s front, the fill comes from the side of the key, and the backlight stays behind, opposing the key. Together, they create different dimensions and depth.
Using just one of these lights rather than three often results in an uneven image. Without the backlight, the key and fill lights would flatten the subject.
Positioning a backlight from a higher angle than the key, at roughly 45 degrees, increases the depth and space behind the subject, forming an outline of light around them. This is sometimes called kicker or rim lighting, and reveals some of the space behind the subject, rather than just saturating it in darkness.
9 tips and tricks for great backlit video
Now that you know what backlight photography is, why it’s used, and how it works alongside other lighting methods, let’s get down to business. Here are nine tips and tricks you can tuck into your brain, plus a few handy backlight photography examples.
1. Adjust your camera settings
Forget about autofocus — switch to manual. Cameras are built to capture frontlit photography, and often struggle to understand backlit compositions without a human nudge. Broadly, you’ll need to overexpose the shot, as the front will be darker than the back.
Try a wide aperture between f/2.8 to f/5.6, an ISO somewhere around the 100 mark, and a shutter speed between 1/100 and 1/640. This is just the start, though. Shoot some test footage, review it, and adjust your settings as required.
2. Not every light is right
You could use a tungsten light, an LED light. It could be a Fresnel light, a wash light — there are so many different lighting styles, which means a little trial and error. And that’s OK. As long as your budget and schedule allow, fiddle with different light sources to find the right match.
3. Don’t use too much light
Unless you’re overloading it for a specific purpose, backlight photography should be low-key and subtle. Try using dimmers or flags to dial down the intensity — the aim is to bring attention to a subject rather than overpower it.
On the other hand, remember that the viewer still needs to see. If you need reminding, here’s that infamous Game Of Thrones episode, The Long Night, in which you’ll struggle to catch any of the action. The show’s cinematographer claimed that viewers just had their TVs calibrated incorrectly, but as a rule of thumb, your content shouldn’t force viewers to upend their settings. Whoops.
4. Limit lens flare and overexposure
Backlight photography is tricky to master because the light’s coming straight at the camera. This usually results in lens flare or too much overexposure, which can stumble from ‘artsy’ to ‘messy’ pretty quick. If it looks strange, flags and hoods are your friends, alongside the dimmers mentioned above.
5. Schedule outdoor shoots early or late
Just around dawn or sunset are perfect for backlighting — that’s why they’re collectively called the Golden Hour, after all! The sun will be low on the horizon, casting a soft, natural light behind your subject. If you leave it too late in the day, the sun will be too high, dispersing its rays more evenly.
Check out this shot from Denis Villeneuve’s adaptation of Dune. The sun casts both Zendaya and the scenery in a ghostly, larger-than-life light. Which is perfect, really, given that Zendaya’s character, Chani, appears to the film’s protagonist in his dreams.
6. Experiment with different angles
The backlight should be behind the subject at about 45 degrees, sure. But it’s worth mixing up the angles every now and then, shooting from different vantage points and moving the backlight. Ideally, the light should still spill around the sides of your subject, leaving the light source largely hidden — see how much you can meddle with that.
7. Try a spot meter
A spot meter measures the light reflected from a subject and adjusts exposure based on that, rather than the outline caused by the backlight. This ensures that your subject receives the right amount of overexposure. Standard exposure readings often underexpose the subject in these situations, as the rim light throws them off balance.
8. Play with the white balance
Nailing the white balance will improve backlit content. The colors will be more lifelike, which can be tricky to gauge when you’re blasting your subject with a backlight.
9. Keep these tips in mind, but don’t stick to them
Know the rules, then break them. Sometimes, a backlight is all you need to create an incredible shot: five seconds of eerie chiaroscuro could say more than an entire script. It might not work in every context, but you won’t know until you try.
Examine the below shot from William Friedkin’s The Exorcist for a final, top-tier example of backlight photography. It may well be the most famous backlit shot out there, and it’s just framed by a light coming from a little girl’s bedroom.
Backlight photography isn’t the quickest or easiest skill to master, but it can make the difference between a flat image and a scene bursting with life. If you’re lining up a shot and it doesn’t hit right, consider the backlight — it might just do the trick.
Another way to spice up your video content is with music. After all, the soundtrack can make or break your content — why let one needle-drop derail your project? Epidemic Sound’s got you covered.
Our catalog is high-quality, affordable, and safe. An Epidemic Sound subscription goes beyond royalty-free music, removing the headache of licensing and freeing you up to do what you do best. You can enjoy the safety of our license hand-in-hand with our massive catalog of 50,000 tracks, covering just about every genre you can think of. You’ll also gain unlimited access to our advanced search functions — finding the right sound’s never been easier.
It’s better than royalty-free. It’s worry-free. Get started with Epidemic Sound below.

Are you a filmmaker? We've got you covered with background music for videos, including:
Take your video editing to the next level with our massive catalog of music for filmmakers.