How to become a Twitch streamer
The streaming market is thriving, and the first platform that might come to mind when talking about streaming is Twitch. But how do you become a Twitch streamer?

The streaming industry is currently on an uprise and it seems impossible to think that only ten years ago, no one even talked about streaming and live streams. In 2020, the market was valued at USD 50.11 billion. It goes without saying: the streaming market is thriving.
The first platform that might come to mind, when talking about streaming, is Twitch. Twitch accounts for more than 70% of the total streamed hours online and there are no signs of it slowing down anytime soon.
Contrary to what many people think, starting out on Twitch is relatively easy. Let’s get into what you need in order to start streaming.
1. Create an account
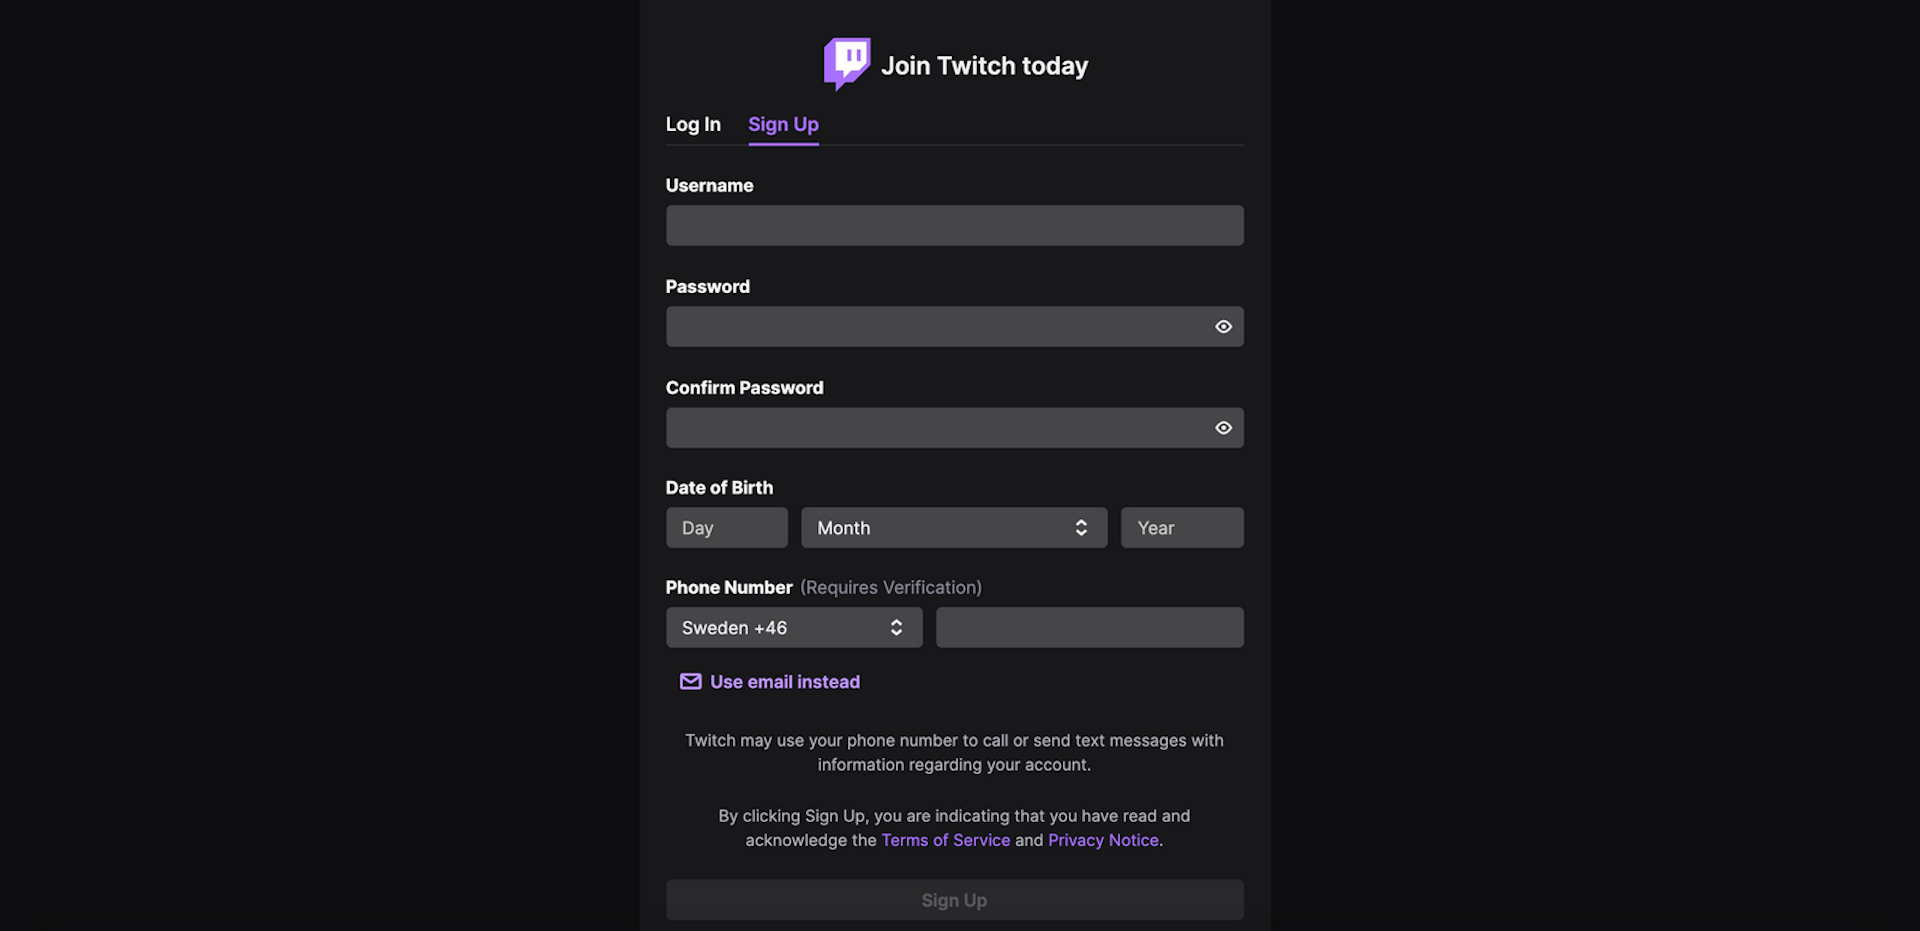
Creating an account with Twitch is incredibly quick and easy. You only need to fill in the initial questionnaire and then confirm your account through 2FA. Here’s a screenshot of what the sign-in looks like.

The procedure should take 2-3 minutes, max, and after that, you’re all set for success.
2. Download a streaming software
Before you start streaming, you’ll need to download and set up a streaming software. This is mandatory if you want to kick off your streaming career. You might want to look into different ones in order to find the one that suits you best.
If you are an absolute novice when it comes to streaming, we suggest you look into Twitch Studio, the Twitch-owned streaming software. It’s free and very simple to use, compared to other more popular tools. The backside is that it offers fewer features and that it might be a little limiting for bigger streamers.
You can easily find a link to download Twitch Studio from your Creator Dashboard that will be available for you as soon as you create a Twitch account.
3. Customize your profile
As we mentioned earlier, many people are looking into becoming streamers. This means that lots of new profiles are created every day. You’ll need to take some time and customize your profile in order to distinguish yourself from the competition. Upload a nice profile picture, take some time to customize your bio, and explain what you want to get out of your profile.
4. Get some gear!
This might not be essential if you’re really just starting out but, in case you want to dedicate more time to your streaming passion, you should probably look into stepping up your webcam/microphone game – at least. Better audio and video quality lead to a better user experience and, consequently, more viewers. In case you’ve been on Twitch for a little while and you want to do things a little more “professionally”, we suggest you get this hardware:
- A decent microphone
- A webcam or camera with good video quality
- A ring lamp for great lighting
- A green screen to remove your background
- A console or “stream deck” for switching to different scenes (in case you have multiple cameras) or regulate audio levels while streaming
- A capture card in case you have both a console and a computer (or multiple computers)

5. How to stream from your computer
Once you’ve created an account, customized it, and downloaded a streaming software (let’s say Twitch Studio for example), it’s time to go live (almost). Download Twitch Studio if you have not done so already and pair it with all of the hardware that you want to use.
Twitch Studio has plenty of already made templates and backgrounds that you can use if you are an absolute beginner. You can set up what notifications will look like, if you want to showcase your webcam footage and many other features. Once the setup is complete and you’re satisfied with it, you can click “Set up stream” at the bottom of the Twitch Studio interface and start streaming right away.
Other tools, including the very popular OBS studio, have similar setup processes.
6. How to stream from your PS4
Streaming from consoles is also possible and easy. Before you start, remember that if you want to stream with both a desktop and a console, you’ll need a “capture card” device.
If you’re only using your PS4, however, you can start by matching your console to your Twitch account. This is achieved through a QR code or through twitch.tv/activate, once you press “Share” on your controller and select “Twitch” as the media.
Once the console is paired with the account, you will be asked to enable the webcam and regulate the audio output settings. This is the last step before choosing your Twitch title and description and starting to stream immediately!

7. How to stream from your Xbox
With Xbox the procedure is one step longer as you need to download the Twitch app from the Xbox store first (this is not necessary with your PS4). Once the app is downloaded you should pair it to your account through twitch.tv/activate and then configure all the hardware you want to use (webcam, microphone, etc.).
When this step is complete, you can start streaming immediately, the only thing you’ll need to do now is name your stream.
8. How to stream from your smartphone
Smartphones might be one of the easiest ways of streaming. All you need to do is download the Twitch app from either Play Store or App Store and match your account to the app. After doing so, you can choose audio and video inputs and start streaming immediately. The whole process shouldn’t take more than 5-10 minutes from start to finish.
Remember that your streams should always follow Twitch's Community Guidelines. That means no gambling, no sexual content, no excessive violence or gore, and no sharing of content for which you don't own the correct license or rights.

How to deal with music on Twitch
As Twitch continues to gain popularity, we at Epidemic Sound encounter more and more people asking questions about both our offering and Twitch’s guidelines when it comes to music and streaming; a consequence of the many DMCA takedowns during the second half of 2020.
Twitch’s guidelines state that you can only play music you have the right to use, or music owned by you. The best go-to solution for people who don’t make their own music is to look into solutions providing direct licenses. Epidemic Sound is an absolute customer favorite as it does not only provide music that can legally be used in streams but also guarantees an always updating catalog with original music that you cannot find anywhere else.
If you want to learn more, check out these two articles: Twitch music guidelines and Epidemic Sound’s product offering.
In conclusion, Twitch is a platform that offers enormous possibilities. Just make sure your gear is up to speed and that your music licensing is on point, to avoid legal issues. As you can see from this guide, starting out is easy and you might even have found your new vocation!

Are you a Twitch streamer? Whether you’re a livestream master or just a beginner, discover what Epidemic Sound has to offer on our Epidemic Sound for Twitch page. Oh, and if you’re looking for some music for Twitch, we got your back!
Related posts:

